The wet-on-wet painting technique, also known as alla prima, has a rich history that can be traced back to the Renaissance period. Artists such as Titian and Rembrandt employed this method, allowing them to create vibrant, dynamic works with a sense of immediacy. The technique involves applying wet paint onto a wet surface, which facilitates a unique blending of colours and textures.
This approach not only enhances the fluidity of the paint but also allows for spontaneous creativity, as artists can manipulate the medium while it remains workable. As the centuries progressed, the wet-on-wet technique evolved, gaining popularity among Impressionist painters in the late 19th century. Artists like Claude Monet and Pierre-Auguste Renoir embraced this method to capture the fleeting effects of light and atmosphere in their landscapes.
The ability to layer colours directly on the canvas without waiting for previous layers to dry enabled them to depict scenes with a sense of immediacy and movement. This technique has since become a staple in modern painting, influencing countless artists who seek to explore the interplay of colour and form in their work.
Summary
- Wet-on-wet technique originated in the 15th century and was popularized by artists like Bob Ross in the 20th century.
- Understanding the materials and tools is crucial for successful wet-on-wet painting, including using a wet palette and soft brushes.
- Techniques and tips for wet-on-wet painting include working quickly, blending colours on the canvas, and using a light touch.
- Exploring colour mixing and blending is essential for creating depth and dimension in wet-on-wet paintings.
- Creating atmospheric and expressive landscapes with wet-on-wet technique involves using a limited colour palette and soft brushstrokes.
Understanding the Materials and Tools
Understanding Oil Paints
The primary medium used is oil paint, renowned for its slow drying time, which allows artists to work with wet paint for extended periods. Oil paints are composed of pigments suspended in a drying oil, typically linseed oil, which gives them a rich texture and depth of colour.
Alternative Mediums and Brushes
For those who prefer a quicker-drying alternative, acrylic paints can also be used, although they require a slightly different approach due to their rapid drying properties. In addition to paint, the choice of brushes plays a crucial role in achieving desired effects. Flat brushes are ideal for broad strokes and blending, while round brushes are better suited for detail work and fine lines.
Additional Tools and Surfaces
Palette knives can also be employed to create texture and add dimension to the painting. Furthermore, a well-prepared canvas or panel is essential; primed surfaces allow for better adhesion of the paint and facilitate smoother application. Understanding these materials and tools is fundamental for artists looking to master the wet-on-wet technique.
Techniques and Tips for Wet-on-wet Painting

Mastering the wet-on-wet technique requires practice and experimentation with various approaches. One effective method is to start with a thin layer of paint on the canvas, which serves as a foundation for subsequent layers. This initial wash can be created using a mixture of paint and medium, allowing for a more fluid application.
Once this layer is dry to the touch but still retains some moisture, artists can begin adding additional colours directly onto it. This layering process creates depth and complexity in the artwork. Another important aspect of wet-on-wet painting is the use of blending techniques.
Artists can achieve smooth transitions between colours by gently brushing them together while they are still wet. A soft brush can be used to feather edges, creating a seamless blend that enhances the overall composition. Additionally, it is beneficial to work quickly; as the paint dries, it becomes increasingly difficult to manipulate.
Keeping a palette of mixed colours nearby allows for quick access and encourages spontaneity in the creative process.
Exploring Colour Mixing and Blending
Colour mixing is an integral part of the wet-on-wet technique, as it allows artists to create a wide range of hues and tones directly on the canvas. One effective approach is to use a limited palette, which encourages thoughtful colour choices and helps maintain harmony within the artwork. By mixing primary colours—red, blue, and yellow—artists can create secondary colours such as green, orange, and purple.
This method not only simplifies the colour selection process but also fosters an understanding of colour relationships. Blending is another critical component of this technique. When working wet-on-wet, artists can take advantage of the fluidity of the paint to create gradients and soft transitions between colours.
For instance, when painting a sunset, an artist might blend warm oranges and yellows into cooler purples and blues to capture the atmospheric effects of twilight. This blending process can be achieved using various tools; soft brushes are ideal for gentle transitions, while palette knives can create more defined edges or textures. Experimenting with different blending techniques allows artists to discover their unique style and approach.
Creating Atmospheric and Expressive Landscapes
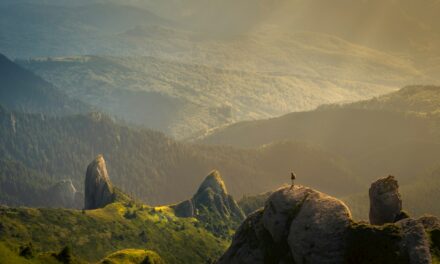
The wet-on-wet technique is particularly well-suited for creating atmospheric landscapes that evoke emotion and depth. By layering colours directly onto the canvas while they are still wet, artists can capture the essence of natural scenes with remarkable immediacy. For example, when painting a misty morning landscape, an artist might begin with a soft wash of pale blue for the sky, gradually adding layers of white to depict clouds and fog.
The ability to blend these colours seamlessly creates an ethereal quality that draws viewers into the scene. In addition to capturing atmospheric effects, this technique allows for expressive brushwork that conveys movement and energy within a landscape. Artists can use bold strokes to depict swaying trees or rushing water, infusing their work with life and dynamism.
The spontaneity inherent in wet-on-wet painting encourages artists to embrace their instincts, resulting in compositions that feel alive and engaging. By experimenting with different brush techniques and colour combinations, artists can develop their unique voice in landscape painting.
Using Wet-on-wet for Floral and Still Life Paintings

Capturing Delicate Transitions
When painting flowers, artists can layer colours directly onto each petal while they are still wet, allowing for natural blending that mimics the delicate transitions found in nature. For example, when depicting a rose, an artist might start with a base layer of soft pink and then add deeper shades of red or burgundy while the paint is still moist. This approach creates depth and dimension within each petal.
Creating Realistic Reflections and Highlights
Still life paintings also lend themselves well to this technique, as artists can capture the interplay of light and shadow on various objects. By applying wet paint onto wet surfaces, artists can create reflections on glass or highlights on fruit that appear luminous and realistic.
Expressing Texture and Form
The ability to manipulate colours while they remain workable allows for greater freedom in expressing texture and form. Whether painting a simple arrangement of flowers or an elaborate still life with multiple elements, the wet-on-wet technique provides endless possibilities for creativity.
Troubleshooting Common Issues
Despite its many advantages, artists may encounter challenges when working with the wet-on-wet technique. One common issue is muddy colours resulting from excessive blending or overworking areas of paint. To avoid this problem, it is essential to limit the amount of blending done in one area; instead of continuously mixing colours on the canvas, artists should aim for intentional strokes that maintain some separation between hues.
Additionally, using a limited palette can help prevent colour muddiness by ensuring that only harmonious colours are combined. Another challenge is managing drying times effectively. While oil paints offer extended working time compared to other mediums, they will eventually dry out if left unattended for too long.
To combat this issue, artists should work in smaller sections rather than attempting to cover large areas at once. This approach allows for greater control over blending while ensuring that paint remains workable throughout the process. If working with acrylics, using a slow-drying medium can extend working time significantly.
Advancing Your Skills with Wet-on-wet
To advance skills in wet-on-wet painting, artists should engage in regular practice while exploring new techniques and styles. One effective way to improve is by participating in workshops or classes focused on this specific method; learning from experienced instructors can provide valuable insights into advanced techniques and approaches that may not be readily available through self-study alone. Additionally, studying works by renowned artists who have mastered this technique can inspire new ideas and encourage experimentation.
Another way to enhance skills is through consistent experimentation with different subjects and styles within the wet-on-wet framework. Artists might challenge themselves by painting en plein air—working outdoors—to capture changing light conditions or by exploring abstract compositions that focus on colour relationships rather than representational forms. Keeping a sketchbook dedicated to colour studies or quick studies can also help refine techniques while fostering creativity.
By embracing both structured learning opportunities and spontaneous exploration, artists can continue to grow their proficiency in this captivating painting method.
If you are interested in exploring different art techniques, you may want to read An introduction to the painting Cut with the Kitchen Knife, 1919-1920 by Hannah Höch. This article delves into the fascinating world of collage art and the innovative work of Höch, a pioneering artist in the Dada movement. Discover how she used scissors and glue to create dynamic and thought-provoking compositions that challenged traditional notions of art.


