In recent years, the world of art has seen a delightful surge in the popularity of DIY art toys. These whimsical creations, often born from the simplest of everyday objects, have captured the imagination of artists and hobbyists alike. The charm of DIY art toys lies not only in their playful aesthetics but also in the creative process that transforms mundane items into extraordinary pieces of art.
This movement encourages individuals to explore their artistic inclinations, fostering a sense of innovation and personal expression. By engaging in the transformation of everyday objects, artists can breathe new life into items that might otherwise be discarded, promoting sustainability and resourcefulness. The allure of DIY art toys extends beyond mere creation; it invites a community of like-minded individuals to share their experiences and techniques.
As artists embark on this journey, they often find themselves inspired by the works of others, leading to a vibrant exchange of ideas and styles. This article aims to guide you through the exciting process of creating your own DIY art toys, from selecting the right objects to showcasing your finished pieces. Whether you are an experienced artist or a curious beginner, the world of DIY art toys offers endless possibilities for creativity and self-expression.
Summary
- DIY art toys are a fun and creative way to express yourself through transforming everyday objects into unique pieces of art.
- When choosing everyday objects for transformation, consider their shape, size, and material to ensure they are suitable for your DIY art toy project.
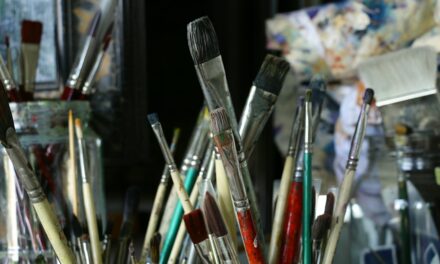
- Essential tools and materials for DIY art toy projects include paint, brushes, glue, sculpting clay, and other decorative elements such as beads or fabric.
- Follow a step-by-step guide to transform everyday objects into art toys, including cleaning, priming, painting, and adding decorative elements.
- Add personal touches and customization to your DIY art toys by incorporating your own artistic style, themes, and colours to make them truly unique.
Choosing the Right Everyday Objects for Transformation
The first step in embarking on your DIY art toy journey is selecting the right everyday objects to transform.
Common household items such as plastic bottles, cardboard boxes, old toys, and even kitchen utensils can be reimagined into unique art toys.
The key is to look at these objects with fresh eyes, envisioning their potential beyond their original purpose. For instance, a discarded bottle can become a whimsical creature with just a few modifications, while an old sock might be transformed into a charming puppet. When choosing objects for your project, consider their shape, texture, and colour.
Items with interesting forms or surfaces can provide a solid foundation for your artistic vision. Additionally, think about the story you want to tell through your art toy. Each object carries its own history and character, which can influence the final design.
By selecting items that resonate with you personally or evoke specific memories, you can create art toys that are not only visually appealing but also imbued with meaning.
Tools and Materials Needed for DIY Art Toy Projects
Once you have chosen your everyday objects, it is essential to gather the necessary tools and materials for your DIY art toy projects. The good news is that many of these items can be found around your home or acquired inexpensively. Basic tools such as scissors, glue, and paint are fundamental to most projects.
A hot glue gun can be particularly useful for securing pieces together quickly and effectively, while acrylic paints offer vibrant colours that can bring your creations to life. In addition to these essentials, consider incorporating other materials to enhance your art toys. Fabric scraps, buttons, beads, and even natural elements like twigs or leaves can add texture and detail to your designs.
If you are feeling adventurous, you might explore mixed media techniques by combining different materials such as paper mache or resin. The possibilities are vast, and experimenting with various tools and materials can lead to unexpected and delightful results.
Step-by-Step Guide to Transforming Everyday Objects into Art Toys
Transforming everyday objects into art toys is an exciting process that can be broken down into manageable steps. Begin by sketching out your ideas on paper; this will help you visualise the final product and plan the necessary modifications to your chosen objects. Once you have a clear concept in mind, gather your tools and materials and prepare your workspace.
A clean, well-lit area will allow you to focus on your project without distractions. Next, start by cleaning and preparing your chosen objects. Remove any labels or residue that may interfere with your design.
Depending on the nature of the object, you may need to cut or reshape it to fit your vision. For example, if you are working with a plastic bottle, you might cut it down to create a base for a character or creature. Once you have shaped your objects as desired, begin assembling them using glue or other adhesives.
Take your time during this stage; patience is key to ensuring that each piece adheres properly. After assembling your art toy, it’s time to unleash your creativity through painting and decoration. Apply a base coat of paint if necessary, allowing it to dry completely before adding additional layers or details.
This is where you can truly personalise your creation; consider adding facial features, patterns, or embellishments that reflect your artistic style. Once you are satisfied with the design, allow everything to dry thoroughly before moving on to the next stage.
Adding Personal Touches and Customization to DIY Art Toys
One of the most rewarding aspects of creating DIY art toys is the opportunity for personalisation and customization. This is where your unique artistic voice can shine through, making each piece distinctly yours. Consider incorporating elements that reflect your personality or interests; perhaps you have a penchant for vibrant colours or a love for nature that could inspire floral motifs on your creations.
You might also explore different techniques such as decoupage or stencilling to add intricate designs or patterns to your art toys. These methods allow for greater detail and complexity in your work while also providing an avenue for experimentation. Don’t hesitate to mix styles or combine various techniques; the beauty of DIY art toys lies in their eclectic nature.
Remember that there are no strict rules—embrace spontaneity and let your imagination guide you. Additionally, consider involving friends or family in the creative process. Collaborative projects can lead to unexpected outcomes and foster a sense of community around your art-making endeavours.
Sharing ideas and techniques with others not only enhances your skills but also enriches the overall experience of creating DIY art toys.
Displaying and Showcasing Your DIY Art Toys
Creating a Dedicated Space
Consider creating a dedicated space in your home where these whimsical pieces can be admired—perhaps a shelf or a corner table adorned with complementary decor.
Exploring Creative Display Options
You might also explore creative display options such as shadow boxes or glass domes that protect your art toys while allowing them to be seen from all angles. If you’re inclined towards photography, consider capturing images of your creations in various settings or against different backdrops. This not only serves as documentation of your work but also allows you to share it with a wider audience through social media platforms or art communities online.
Sharing Your Work with Others
Participating in local art fairs or exhibitions can also provide an excellent opportunity to showcase your DIY art toys. Engaging with fellow artists and enthusiasts can lead to valuable feedback and connections within the creative community. Whether displayed at home or shared with others, showcasing your work is an integral part of the artistic journey.
Tips and Tricks for Maintaining and Preserving DIY Art Toys
As with any artistic creation, maintaining and preserving your DIY art toys is essential for ensuring their longevity. Depending on the materials used, some pieces may require special care to prevent deterioration over time. For instance, if you have used paint or glue that is not water-resistant, it’s advisable to keep your creations away from direct sunlight or moisture.
Regular dusting can help keep your art toys looking fresh and vibrant; a soft cloth or brush will suffice for this task. If any repairs are needed over time—such as re-gluing loose parts—address them promptly to prevent further damage. Additionally, consider using a clear sealant spray on painted surfaces to protect against scratches and fading.
If you plan on displaying your DIY art toys outdoors or in high-traffic areas, ensure they are securely anchored or protected from potential accidents. Creating a safe environment for your creations will allow you to enjoy them without worry while also preserving their integrity for years to come.
Exploring Different Styles and Techniques for DIY Art Toy Transformation
The world of DIY art toys is rich with diverse styles and techniques waiting to be explored. From minimalist designs that focus on form and colour to intricate sculptures adorned with detailed embellishments, there is no shortage of inspiration available for artists at any skill level. Consider delving into various artistic movements—such as surrealism or pop art—to inform your approach and expand your creative repertoire.
Additionally, exploring digital tools such as graphic design software may open new avenues for creating digital prototypes before committing to physical materials. Ultimately, the journey of transforming everyday objects into art toys is one of exploration and self-discovery.
Embrace the process wholeheartedly; allow yourself the freedom to experiment without fear of failure. Each creation will contribute to your growth as an artist while adding joy and whimsy to the world around you.
If you are interested in exploring different art techniques, you may want to check out An Introduction to the Art Technique: Sfumato Technique. This article delves into the fascinating world of sfumato, a painting technique that creates soft, blurred edges and transitions between colours. By learning about this technique, you can add a new dimension to your DIY art toys and transform everyday objects into unique works of art. For more inspiration and ideas, be sure to also read Palette of Ideas and Creative Expressions.
FAQs
What are DIY art toys?
DIY art toys are handmade or customised toys created by artists or enthusiasts using everyday objects or materials. These toys are often transformed into unique and artistic pieces through various techniques such as painting, sculpting, or assembling.
What are some examples of everyday objects that can be transformed into art toys?
Everyday objects that can be transformed into art toys include action figures, dolls, wooden blocks, plastic animals, and other small toys. Additionally, items such as old electronic devices, bottle caps, and cardboard boxes can also be repurposed into art toys.
What are the benefits of creating DIY art toys?
Creating DIY art toys allows individuals to express their creativity, develop artistic skills, and repurpose materials that would otherwise be discarded. It also provides a unique and personalised alternative to mass-produced toys, and can be a fun and fulfilling hobby for people of all ages.
What are some popular techniques for transforming everyday objects into art toys?
Popular techniques for transforming everyday objects into art toys include painting, sculpting, decoupage, and assemblage. Artists may also use techniques such as customising with fabric, adding embellishments, or incorporating mixed media to create one-of-a-kind art toys.
Are there any safety considerations when creating DIY art toys?
When creating DIY art toys, it is important to consider safety, especially if the toys are intended for children. Artists should ensure that any materials used are non-toxic and safe for handling. Additionally, sharp or small parts should be securely attached to prevent choking hazards.